
 |
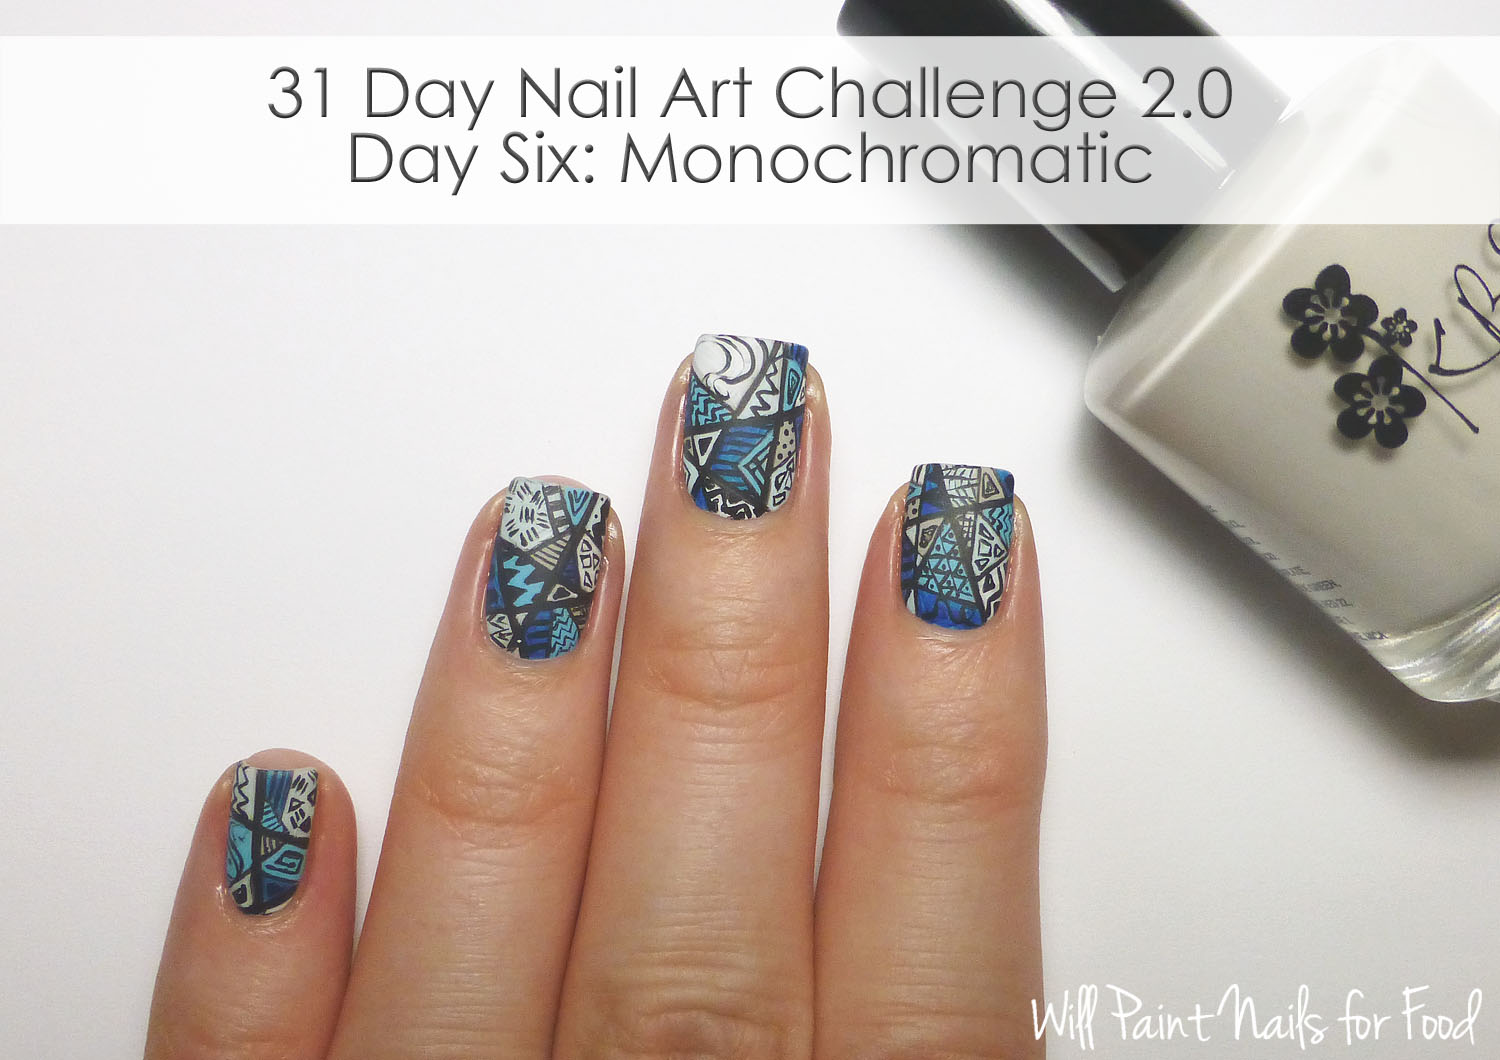
| Monochromatic intricate patchwork nail art |
I wanted to do a variation on my black-and-white nails from earlier this week. The design is very similar but instead of trying to follow my original source, I just did my own thing. And since the design is rather intricate I put together a step-by-step tutorial for you!
 |
| Monochromatic intricate patchwork nail art |
About this design:
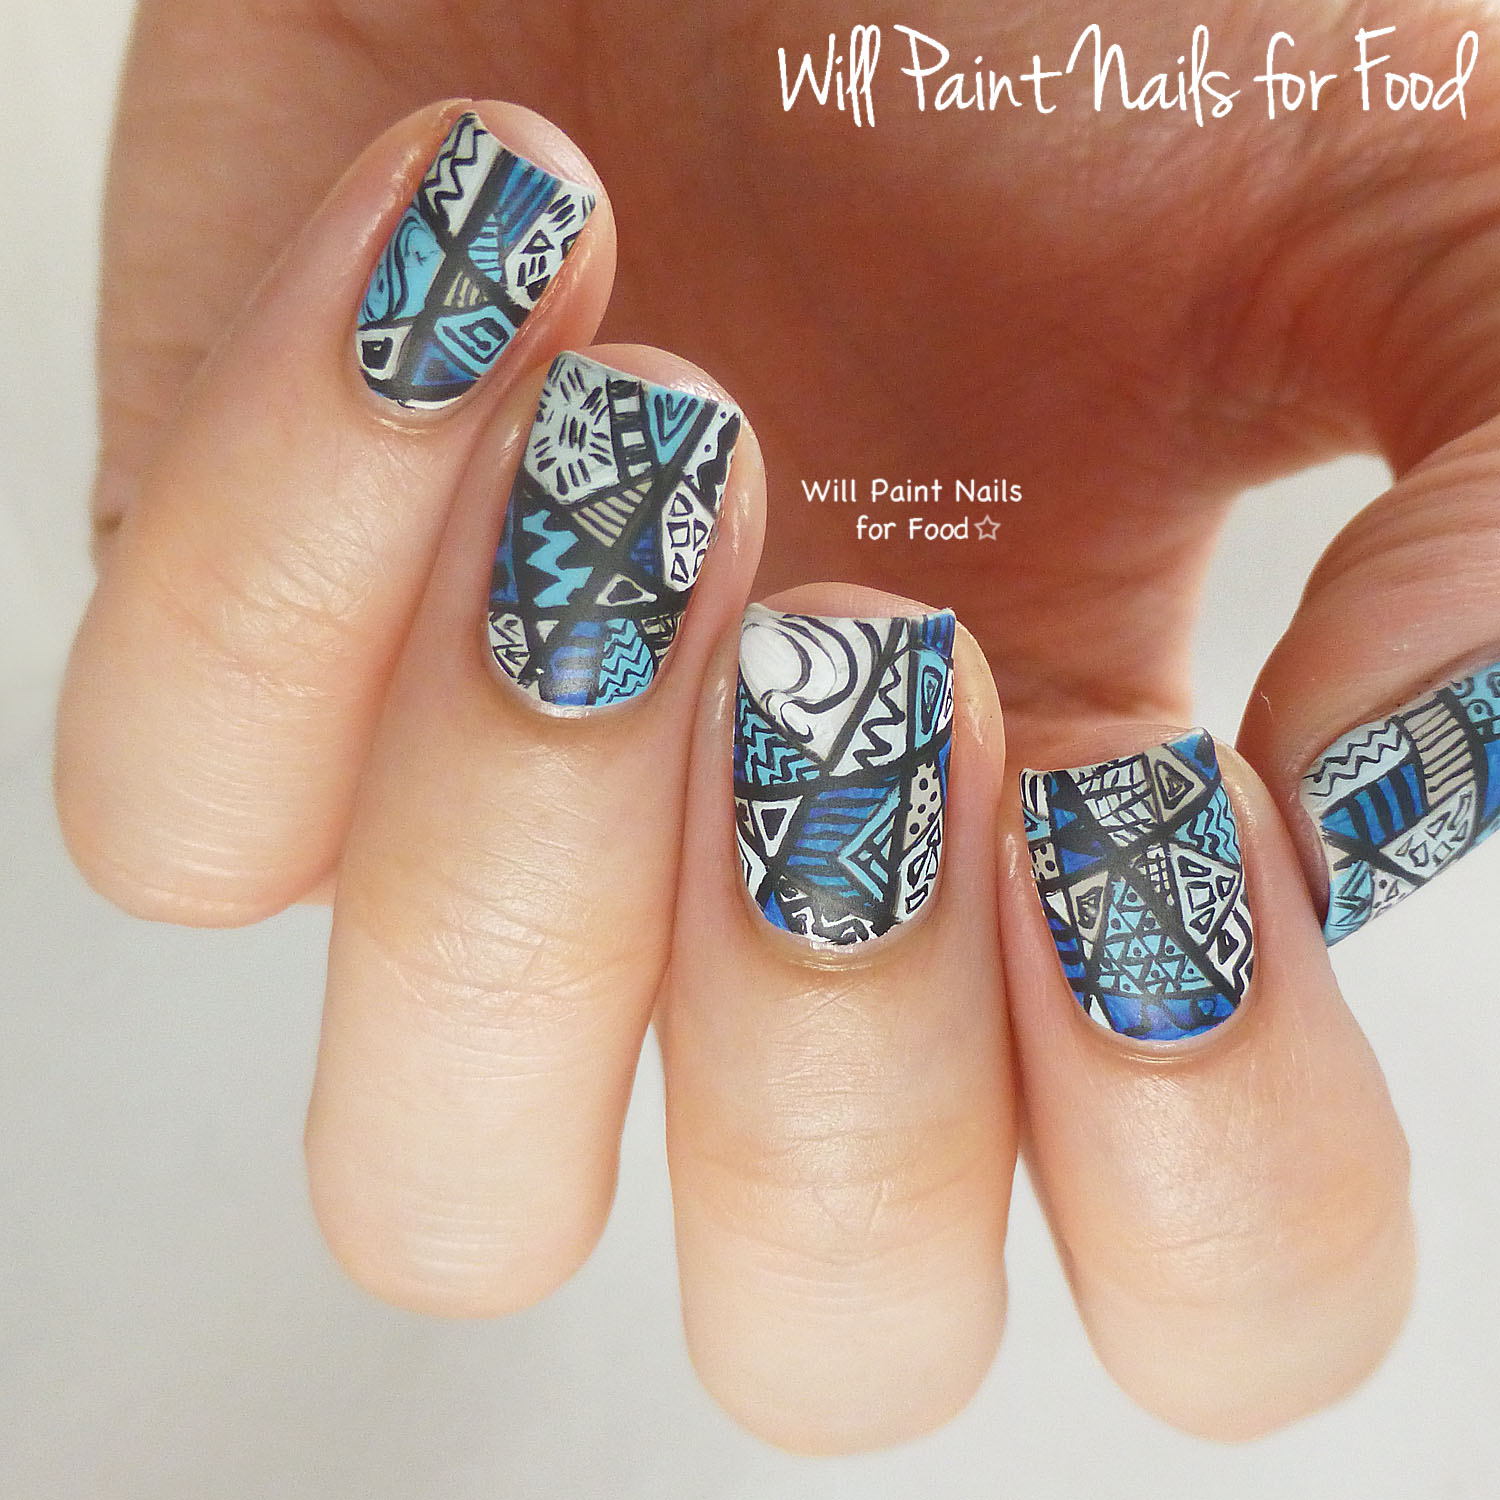
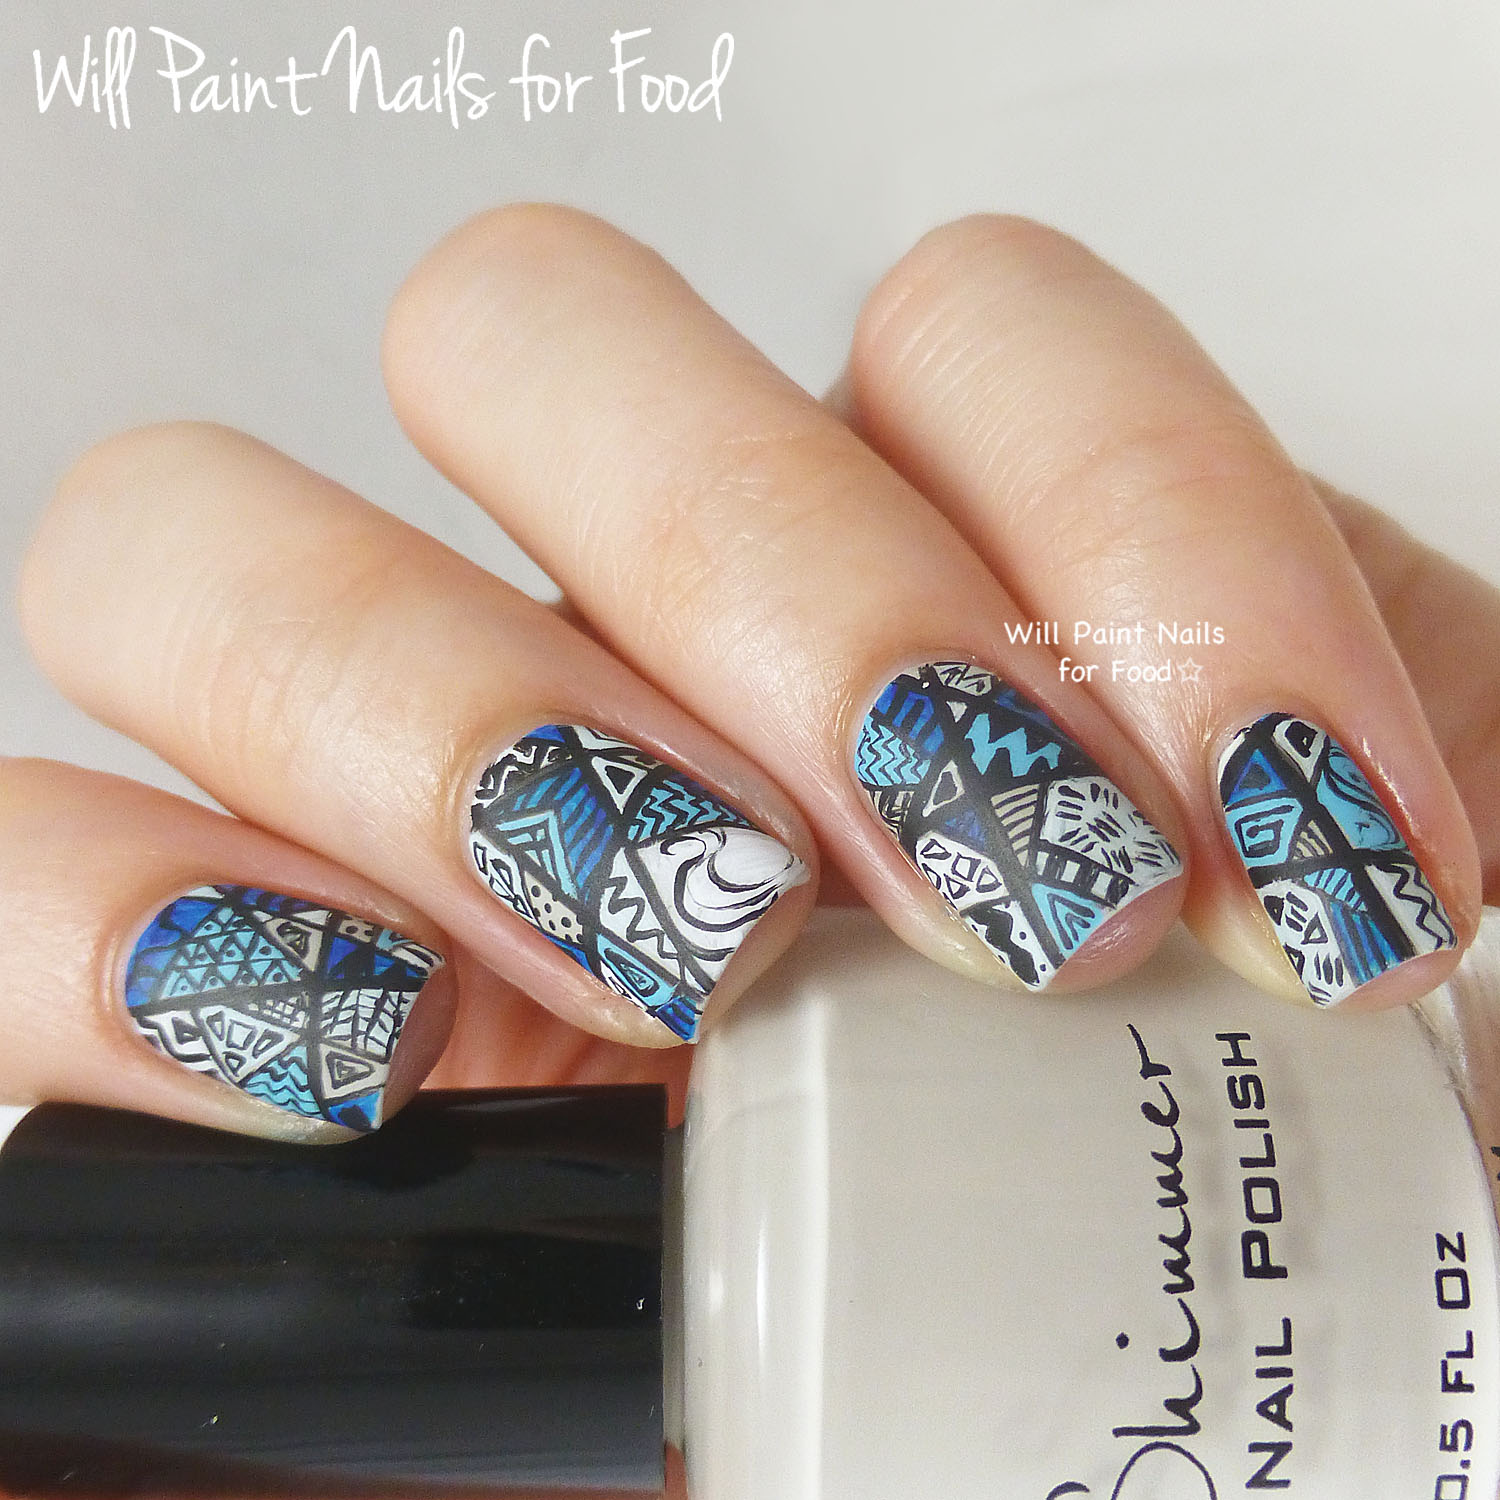
As I mentioned above, this is very close to my black and white nails that I did for Day Five. The only change is that I started with a grey base, and I used different shades of blue plus white to fill in the spaces. I also didn't use the original design inspiration as my starting point, so the doodles are modelled less after the original artist, and instead were based on what came to mind.
 |
| Monochromatic intricate patchwork nail art |
To get this look:
Since the design is quite intricate I put together a step-by-step so you can see how it was done.
 |
| Monochromatic intricate patchwork nail art |
What you'll need:
- A grey-toned base polish. I used KBShimmer How You Dune?
- Acrylic paints in white, black, Phthalo blue, and Van Dyke Brown
- Detail brushes in different sizes. I used a Winstonia Kolinsky Sable #000 for the lines and Pure Color Glamor #1 from Stylish Nail Art shop on Etsy for the doodles.
- Top coats. I used KBShimmer Clearly On Top and Essie Matte About You
 |
| Monochromatic intricate patchwork nail art tutorial |
Step-by-Step:
- Paint your base colour and let it dry. Using black acrylic, paint in a few thicker lines, these will provide a structure for the rest of the lines.
- Put in more lines, you'll end up with what looks like the beginning of a stained glass mani.
- Mix some light blue and fill in a few spaces. Note: when filling in spaces don't worry about covering it completely, you can leave it a bit streaky. Also try to stay in the spaces, but if you accidentally go over the black lines you can fix it later.
- Mix in a lighter blue and fill in some more spaces. I mix the blue in with a bit of brown to get a muted shade.
- Fill in some spaces with blue (not mixed) and white (not mixed). Leave some spaces grey.
- Using your smallest detail brush fill in your spaces with doodles. Think stripes, zig zags, dots, swirls, etc.
- Continue to fill in all the spaces with different doodles. Lots of variation is good here!
- Clean up any black lines that were covered with paint. Clean up your cuticles and sides of your nails with a small angled brush dipped in acetone. When design is completely dry, top with a quick dry top coat and then a matte top coat. (matte top coats tend to smear nail art).
And you're done! Voila!
 |
| Monochromatic intricate patchwork nail art |
Final Thoughts:
I had a lot of fun with this, and I hope you enjoyed the step-by-step tutorial! It's hard to tell but I think I like this variation better than my black and white one.
What do you think of this? Do you prefer the monochromatic or the black and white version?
---
These look amazing! Love that you did all these details free handed, it must have taken a while.
ReplyDeleteThanks Lisa! It did take awhile but I watch Netflix while I'm working so it goes by quickly (it also drags on a bit because I'm watching something but oh well!). :)
DeleteThanks for the tutorial! I love these with the blue monochromatic look.
ReplyDeleteYou're welcome! And thank you, I think I prefer the blue monochromatic as well.
DeleteWow - these are amazing. I wouldn't want to take them off x
ReplyDeleteThank you! I actually took them off yesterday to do my Day Seven nails, but yeah, I wish I could have left them on longer. :(
DeleteThis is amazing! So precise, so beautiful... I think it's a kind of magic :)
ReplyDeleteThank you Phoenix, what a sweet thing to say. :)
DeleteI absolutely love this!! Have to do a mani inspired by this!
ReplyDeleteThank you Novi, I'd love to see that!
DeleteThese are so cool!!! Thanks for the tutorial!!
ReplyDeleteThanks Anne, and you're very welcome!
DeleteGirl! This is freakin' amazing. My hand is never steady enough for this kind of art! It makes me appreciate it even more!
ReplyDeleteThank you Valesha! I think your beautiful swatches more than make up for not doing intricate nail art! <3
DeleteThis is so amazing, and so much beautiful intricate work! Bravo!
ReplyDeleteThanks so much Kellie!
DeleteI think I love the colored version of this even more than the black and white (and I LOVED the black and white so that's saying something!). Thanks for the step-by-step...I might have to give this a try :)
ReplyDeleteThanks Lindsey! You should try it, you'd probably hit it out of the park! :D
DeleteThese are incredible! I think I need those brushes because those tiny lines are so clean!!
ReplyDeleteThe brushes are both great, especially the Pure Color Glamour - I've only used mine a few times but I'm hooked!
DeleteI love this design so much. Especially because you used blues, my favorite color. Your design and detail is beautiful! :)
ReplyDeleteThanks so much Krystal! I love blue as well, it's also my favourite colour.
DeleteI completely love this. I really want to copy it! You have an incredible eye for detail.
ReplyDeleteThanks Kelli! I'd love to see you do this design! You'd do such a great job! :)
DeleteI love these! The addition of the colour makes them more interesting for me than the plain black and white version as well :)
ReplyDeleteThanks Kerry! I feel the same way as well. :)
DeleteWow girl, I looooove these! So pretty!
ReplyDelete